
Getting Started on Phoenix Bonds — A Step-by-Step Guide

Phoenix Bonds, a novel principal-protected amplified yield product developed by LiNEAR Protocol, launched on mainnet today. With an innovative bonding mechanism that enables much higher yield than traditional staking and liquid staking protocols, Phoenix Bonds aims to become the leading yield amplifier for the NEAR community. Since we received a lot of inquiries on how it works, here is a step-by-step guide to Phoenix Bonds.
If you want to participate in Phoenix Bonds and maximize your yields, head over https://phoenix.linearprotocol.org and start creating a bond now!
Currently, Phoenix Bonds is in the 15-day bootstrapping stage. During this period, users can only create bonds and cancel bonds. Other functions like “Claim” and “Redeem” will be released after the bootstrapping period. Before getting into the operations, let us familiarize ourselves with the interface of the app!
App UI Walkthrough
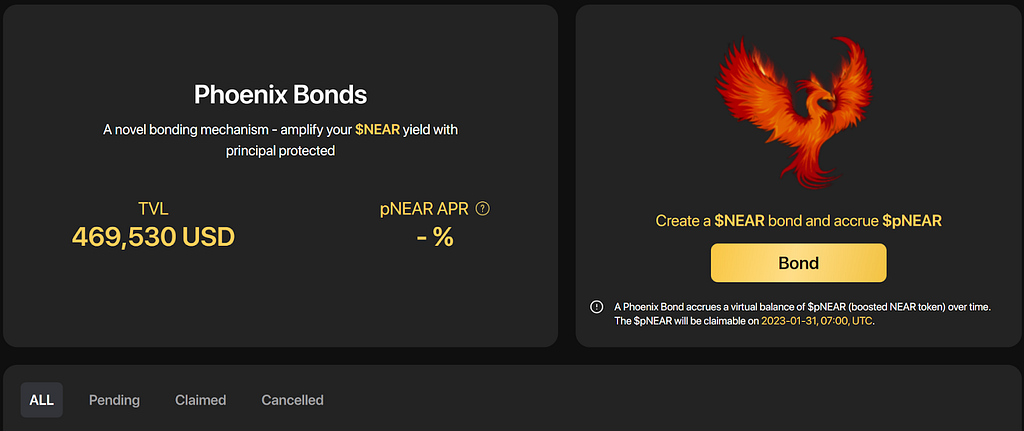
First, visit Phoenix Bond’s home page with a web browser at https://phoenix.linearprotocol.org. The left side of the homepage showcases the basic data: TVL is the current total locked value of Phoenix Bonds, and pNEAR APR represents the annualized rate of return by holding $pNEAR as its floor price increases (Since the claim function is not activated during the bootstrapping period, there is no $pNEAR in circulating supply, and APR is not available for display yet).
On the right hand side, you will see the “Bond” function. By pressing the button, users can bond $NEAR and accrue $pNEAR to generate a higher yield. The “Claim” function will be available on or after Jan 31. At the same time, users can also choose to “Cancel” the bond at any time after creating a bond and recover all the $NEAR deposited to the protocol. In other words, unlike a lot of DeFi protocols, there is no loss of your principal when using Phoenix Bonds!
There are 4 buttons at the bottom that display all the bonding records of the user; “Pending” represents the bond in progress; “Claimed” represents the bond that has been claimed; “Canceled “represents the bond that has been canceled.
Step-by-step Guide
To create a bond, users must ensure that they have a NEAR account and that there is a sufficient amount of $NEAR tokens in the account.
If you don’t have one, please visit https://senderwallet.io/ or https://wallet.near.org and create your own NEAR account.
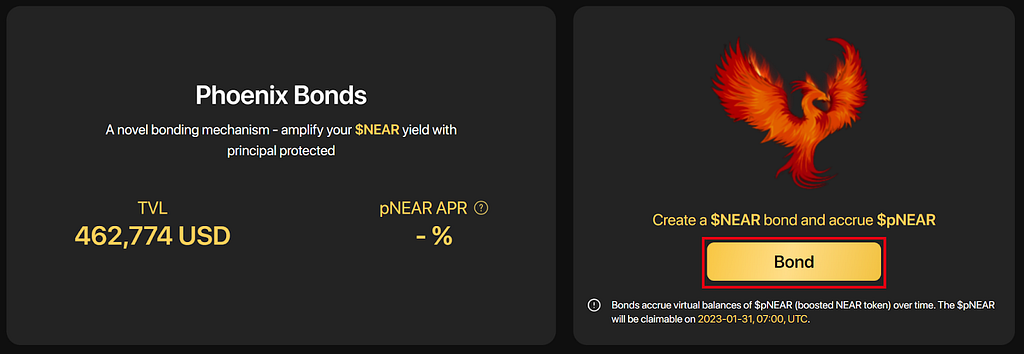
First, connect your NEAR wallet by clicking the “Connect Wallet” yellow button on the right side of the home page. Then, press the “Bond” button, and a new window will pop up.
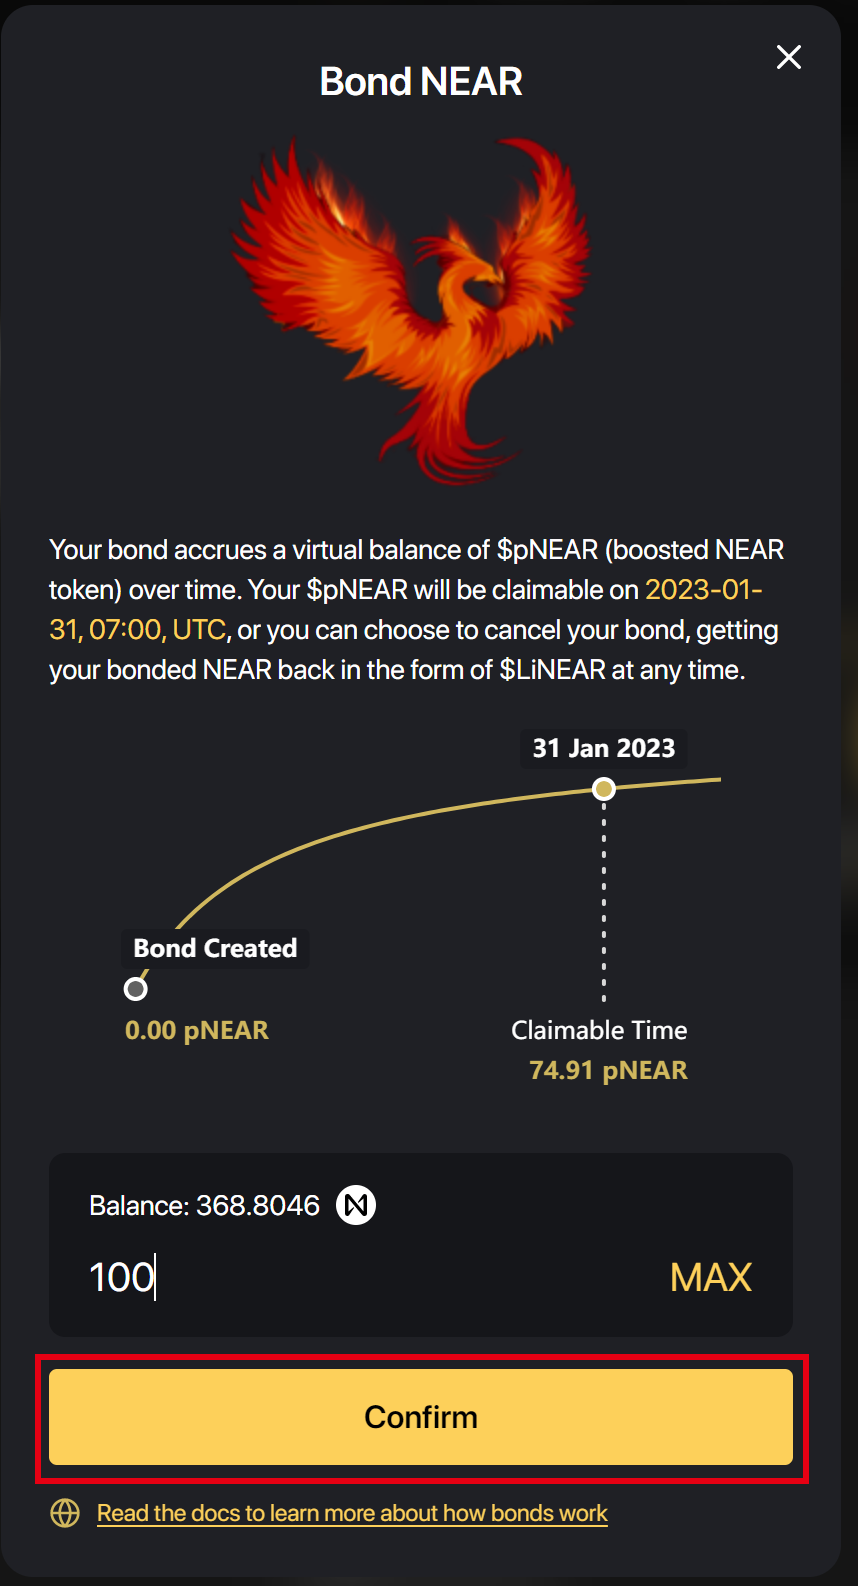
The “Balance” at the bottom represents the $NEAR balance in the user’s wallet account. Enter the $NEAR amount you want to bond. If you want to deposit all the funds, simply click the “MAX” button on the right, and then confirm. You will then be prompted to confirm the transaction on your NEAR wallet to complete bond creation.
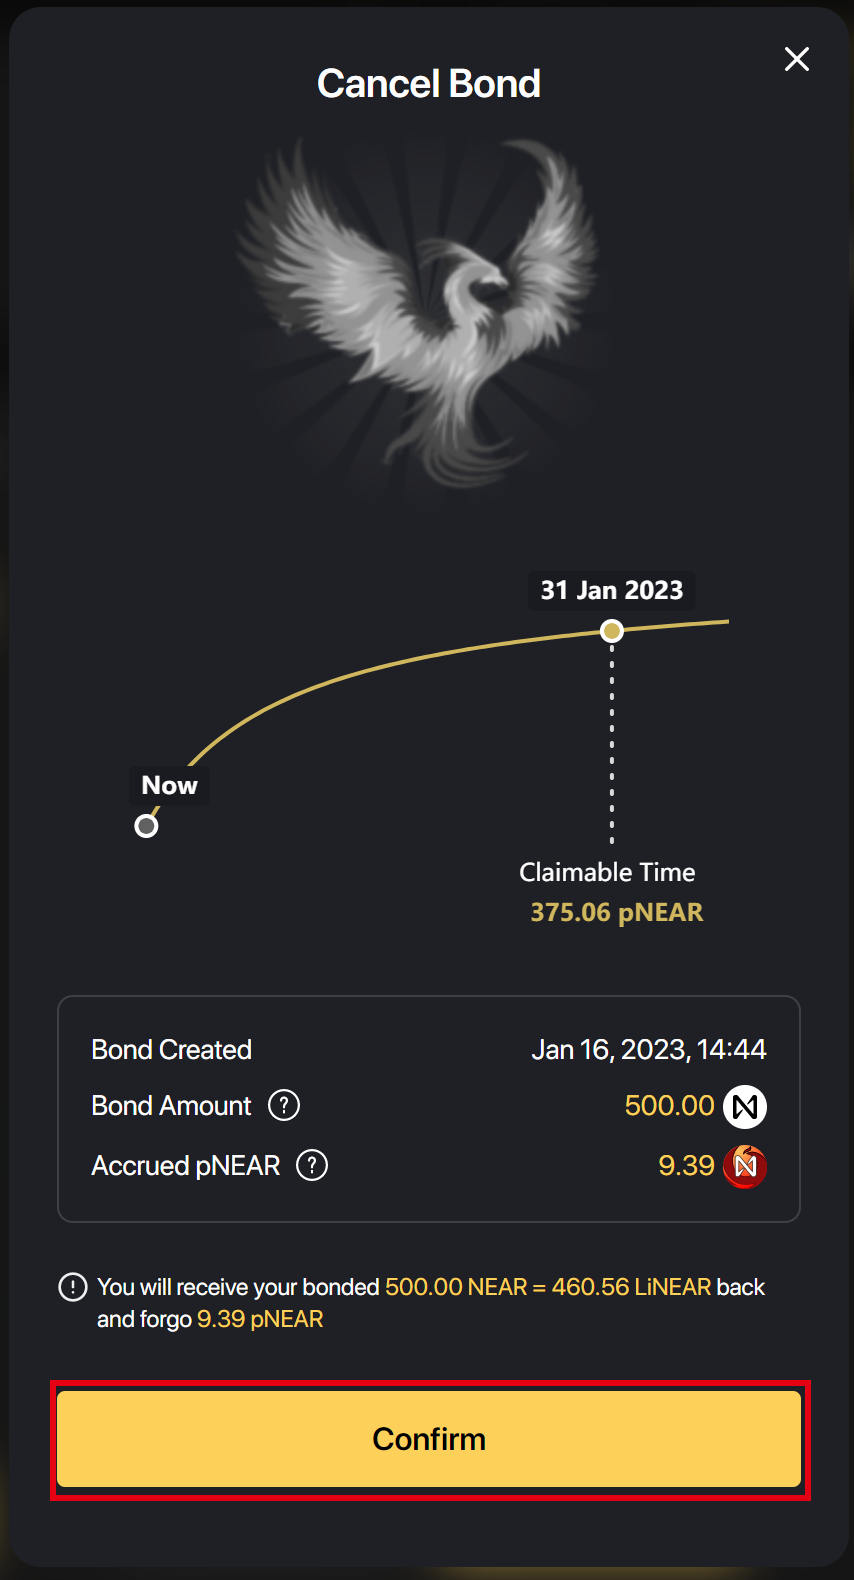
After creating a bond, users can cancel it at any time. Scroll down to the bottom, and you will see the bond you created. Click the “Cancel Bond” button on and Confirm in the pop-up window to cancel the bond.
The curve indicates the dates and corresponding amount of claimable $pNEAR. When you hover the mouse on the curve, you will see the different dates and the respective amount of $pNEAR you can claim. When the bootstrapping period ends, users will be able to “Claim Bond”. On the same page, we will also remind users of the amount of $NEAR you are going to obtain from canceling your bond, and the total amount of $pNEAR you forgo.
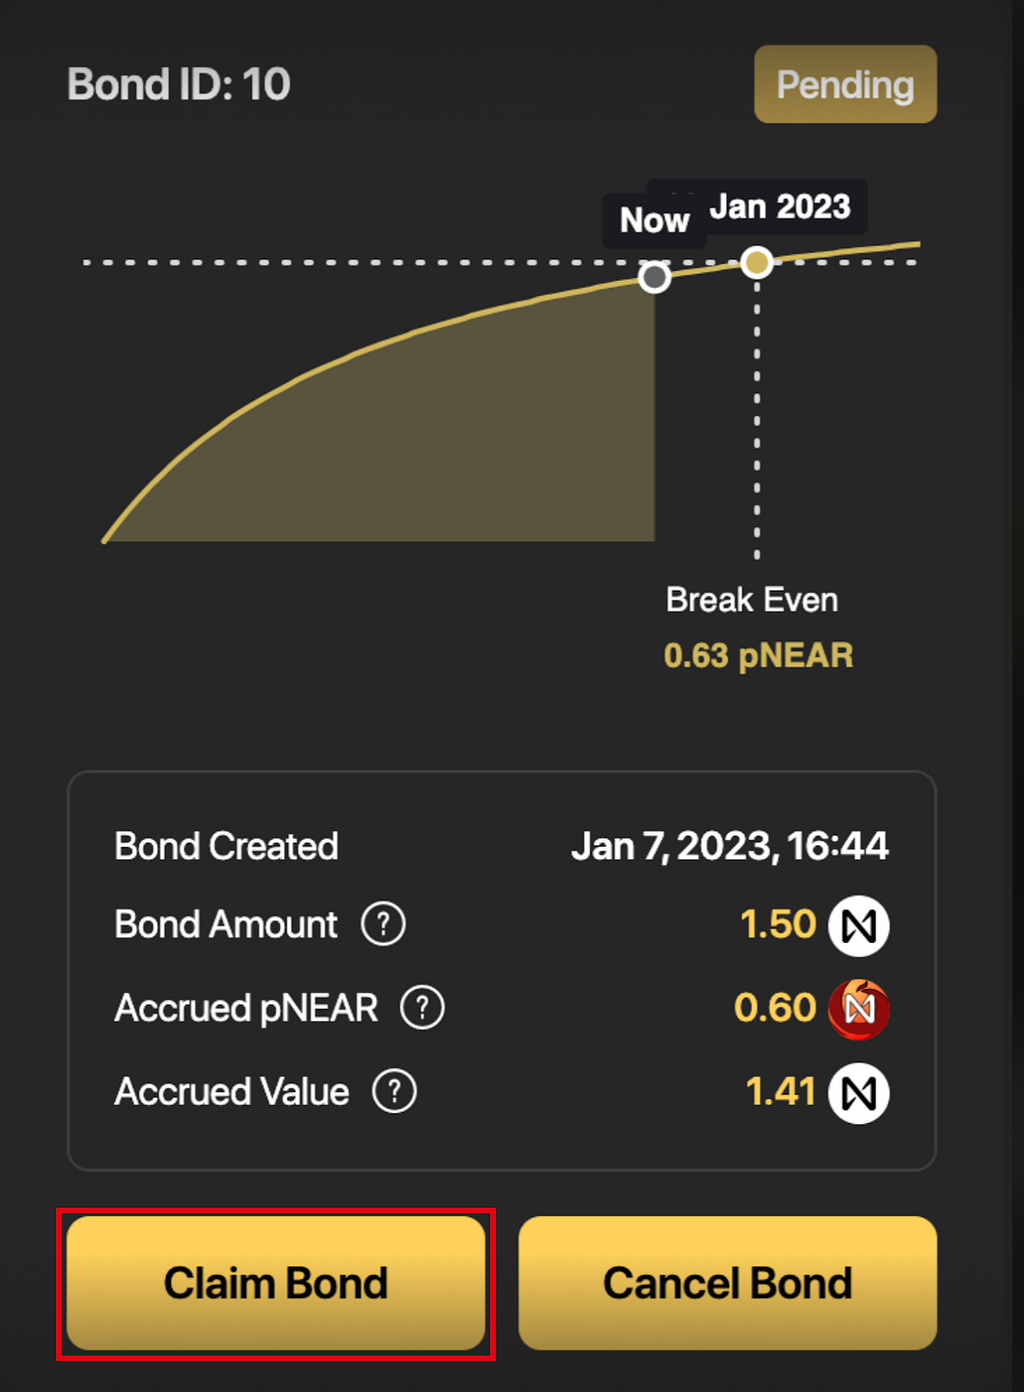
Simply click the “Claim bond” button and confirm on your NEAR wallet to complete the “Claim bond” process.

The curve chart shows the current time as well as the estimated date and time when the user breaks even. The info section below displays the bond creation time, amount of $NEAR deposited, the accumulated amount of $pNEAR, and the accrued value of $NEAR obtained.
Please note that one bond can be claimed only once. Please remember to check the bonded amount and accrued $pNEAR carefully so you won’t claim too early, and result in loss of funds!!!
Final Reminder
The earlier you bond your $NEAR, the faster the accumulation of $pNEAR will be, and the higher yield you can earn. Currently, it takes 52–65 hours to unstake your $NEAR. If you wish to participate in Phoenix Bond, make sure you unstake your $NEAR in time and start bonding ASAP!
Start bonding on Phoenix Bonds now: https://phoenix.linearprotocol.org
About Phoenix Bonds
Developed by LiNEAR Protocol, Phoenix Bonds is a novel bonding mechanism that enables principal-protected amplified yield for end-users. Compared to the current ~10% average APY from $NEAR staking and liquid staking protocols, Phoenix Bonds can possibly amplify the yields potentially enfold or even more.
Please follow the LiNEAR-Phoenix Bond Twitter account to get the latest updates!
Getting Started on Phoenix Bonds — A Step-by-step Guide was originally published in NEAR Protocol on Medium, where people are continuing the conversation by highlighting and responding to this story.
